We were having cold-spring-like weather in late June, so here is a good indoor craft we did (though will also work for the now-sweltering heat!): Flower “stained glass” windows. I saw this idea over at The Artful Parent. We did briefly head out to the yard to gather flowers & leaves, which was a nice respite from being inside.
Bl choosing flowers to pickHave I mentioned Bl REALLY likes being outside?Weeds are a good choice
Materials:
– contact paper ( got a 12″ x 36′ roll at Walmart for about $5)
– paper plates
-exacto knife & cutting mat/cardboard ( to cut middle out of plate)
-scissors (to cut contact paper)
-flowers/leaves
Bl was a bit interested in pulling the leaves off the flowers (what toddlers isn’t?), but lost interest in sticking them on the contact paper. Bl took a piano break.
Which was okay, because that left Mommy with a pile of flowers to play with. There is WAY worse ways to be left.
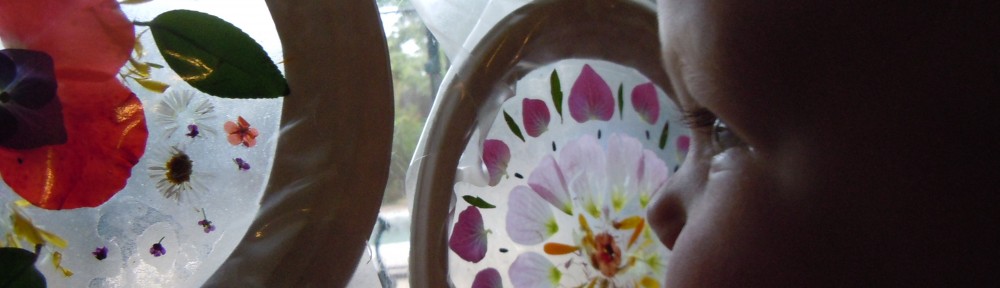
Once it was “completed”, I covered it with another piece of contact paper (flowers sandwiched between the sticky sides). I left the contact paper long, and used the overhang to stick it to the window (not pretty, but toddler-watching-quick).
Voice of experience: be careful how you apply the contact paper/ smooth it down, so the petals/leaves don’t get folded over the wrong way
Bl checking out Mommy's work
After seeing the first finished product, Bl was much more interested in taking part. Unfortunately, so was Mommy….
*sigh* *process, not product….*
Once the flower carnage was over, and Bl had moved on to other things, I recreated my flower mandala.
Bl appreciating the view
I tried the activity again with Br (3 1/2). He was certainly more interested in taking part, but wanted to generally put the whole flower on, rather than individual petals, despite my explanations it would be very lumpy and not as easy to see through.
I had Br help figure out how big to cut the contact paper ( lesson in relative size) and cut it (scissor practice= fine motor skills).
Br measuring & cutting the contact paper for his "stained glass"
Okay, so Br was probably more interested in the chance to use big scissors than the artistic design.
Br's completed design-Notice his rapt attention to smoothing the contact paper on carefully.... 😉 Oh well.
It will be interesting to see how the boys differ doing this activity in the future, but was pretty decent for a first-attempt. Okay….mostly, I enjoyed playing with the flowers…. 🙂
Post Script: both kids found these way more interesting once they were hung on our sliding glass door- it was neat to see the details that showed up in the flowers & leaves once a little light was shining though them.
There was a potluck lunch at Br’s (3 1/2) preschool for the last day of the regular school year. We were supposed to bring “something with fruits or vegetables”, so I asked Br if he wanted to make “his salsa” for his friends at school.
We’d made this once before. Br really enjoyed doing, and we all ate it, even Bl! It is surprisingly good, and is a great way to get Br involved in the kitchen.
Materials:
-Bowl
-Kitchen Shears
-canned “Fire Roasted Tomatoes”
-can opener
-green onions
-herbs (we used fresh oregano & fresh cilantro*)
-lime/lemon (optional)
-tortilla chips (or anything else you like to eat with mild salsa)
*depending on the herbs you use (& the size of the leaves), the parent may want to chop them up first to avoid a “salad” feel
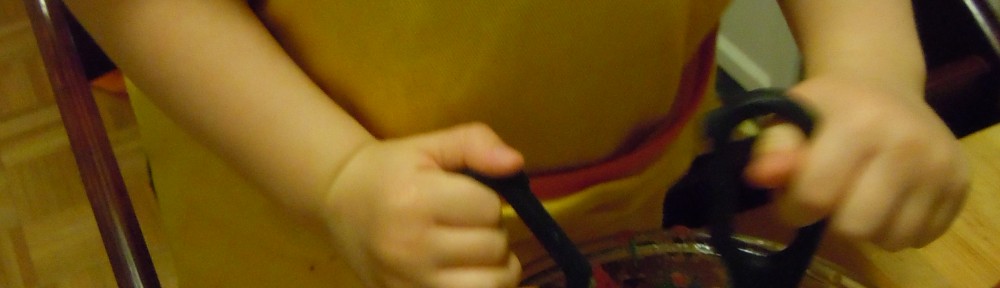
Open the can of fire roasted tomatoes (I let Br turn the handle for the can opener once I had it started). Dump them into the bowl. Arm child with the kitchen shears and have them go at it (with appropriate warnings about sharp scissors and the avoidance of appendage or little brothers)!
Br chopping his salsa
I chopped the root end of the green onion off, then passed it to Br to cut up with the kitchen shears. He cut a lot of the pieces really big, so I pointed out to him to cut them smaller with his shears once they were in the bowl.
I had Br pull the leaves of the herbs of their stem. For the oregano, I showed him how to lightly pinch the stem and pull it through his fingers to get all the leaves off at once. He thought that was pretty amusing. 🙂 I chopped the cilantro for him, then had Br use a little scraper to put it in the bowl. I had Br smell the different ingredients, and taste it at different points to “decide what we needed to add”, to help bring in the sensorial component.
We also put in a squeeze of lemon. I squeezed it with my hand, but I probably could have had Br do it if we’d used a citrus juicer or reamer.
Stir, check there aren’t any giant chunks left (and if there are, have them cut them with the shears), and sample!
Post Script: Br had tried to pressure some of his kid friends to try it who apparently weren’t “salsa fans”, but I got a number of compliments from the parents & teachers, & they were shocked to find out Br had made it himself!
Bl (15 months) was wandering around the house “wearing” the laces from a lacing game I bought for Br (3 1/2) at a yard sale last week. Our youngest does like his necklaces…
This reminded me of an lacing activity for toddlers I had seen *somewhere* in the blogosphere ( I can’t seem to remember where- if you recognize the idea, please let me know so I can credit them!), so I decided to try it today with Bl. Luckily, it was super quick & easy!
Materials:
-paper towel and/or toilet paper rolls
-ribbon (about 2-3 feet)
-index card
-pipe cleaner
-scissors
our materials
Use your scissors to punch a hole in the middle of the index card
Thread the ribbon through the hole and tie a knot in the end large enough to keep the ribbon from coming back through the hole.
Ribbon knotted through index card
Tie the other end of the ribbon around the middle of the pipe cleaner
Ribbon tied around pipe cleaner
Fold the pipe cleaner in half and wind the halve together to make your “needle”
Pipe cleaner "needle)
Voice of Experience: make sure you trim the ribbon tied to the pipe cleaner short, so it doesn’t interfere with the lacing
Cut the paper towel/ toilet paper rolls into ~1-2 inch wide pieces
Cutting the rolls- don't get distracted by my gigantic red scissors!
While I was distracted by my gigantic red scissors (see note above), Bl figured out he could shove things under his table topper.
Bl: "That piece of snap pea fit so nicely, lets see how a carrot does under here..."
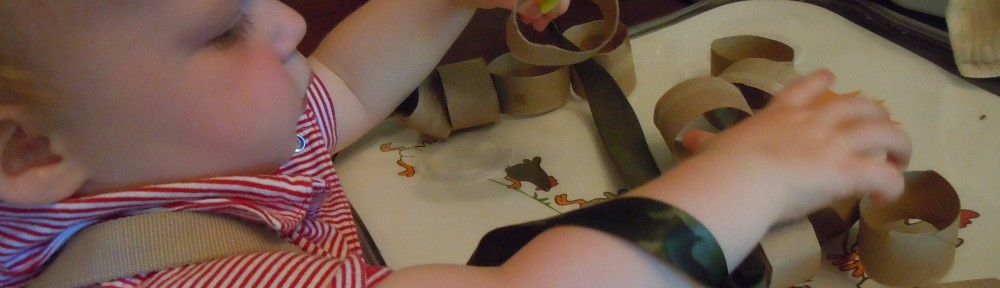
I modeled to Bl how to slip the pieces of roll on to the “needle” and then thread them down the ribbon. He was definitely very interested. It seemed to still be on the edge of his developmental ability (especially the part where he would need to switch hands to allow the roll to go down the ribbon after getting it on the “needle”). I ended up holding the needle for him a lot of the time, and helping thread the peices down. He did take a few turns on his own as well, but he kept wanting to thread back through pieces already on the ribbon and getting tangled up. It held his attention for at least a few minutes though ( which is ETERNITY for a 15 mo old)!
I hadn’t put this away yet, so I trimmed the index card into a nicer shape while sitting at the table in the lull between finishing dinner and the mad rush to get everyone to bed before half past bedtime.
Trimmed index card end
And here it is all set up on the shelf in case Bl wants to try it again tomorrow while Mommy is at work!


")


