Kid Salsa* (*made BY kids, not OF them…)

There was a potluck lunch at Br’s (3 1/2) preschool for the last day of the regular school year.  We were supposed to bring “something with fruits or vegetables”, so I asked Br if he wanted to make “his salsa” for his friends at school.

We’d made this once before.  Br really enjoyed doing, and we all ate it, even Bl!  It is surprisingly good, and is a great way to get Br involved in the kitchen.

Materials:

-Bowl

-Kitchen Shears

-canned “Fire Roasted Tomatoes”

-can opener

-green onions

-herbs (we used fresh oregano & fresh cilantro*)

-lime/lemon (optional)

-tortilla chips (or anything else you like to eat with mild salsa)

*depending on the herbs you use (& the size of the leaves), the parent may want to chop them up first to avoid a “salad” feel

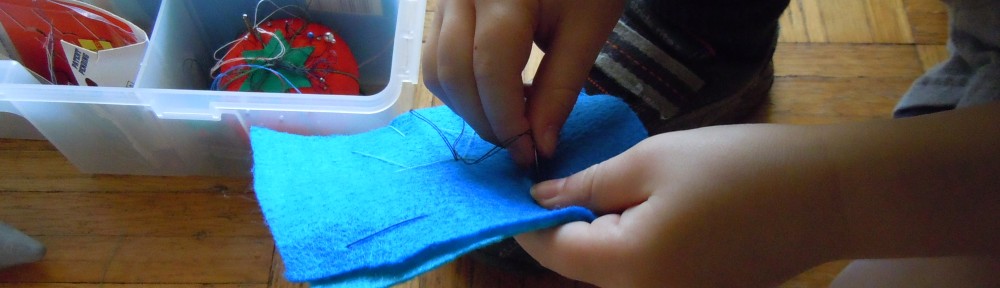
Open the can of fire roasted tomatoes (I let Br turn the handle for the can opener once I had it started). Dump them into the bowl.  Arm child with the kitchen shears and have them go at it (with appropriate warnings about sharp scissors and the avoidance of appendage or little brothers)!


Br chopping his salsa


I chopped the root end of the green onion off, then passed it to Br to cut up with the kitchen shears.  He cut a lot of the pieces really big, so I pointed out to him to cut them smaller with his shears once they were in the bowl.

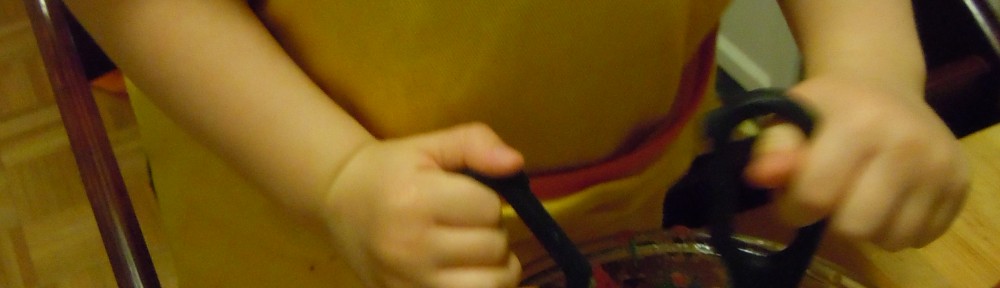
I had Br pull the leaves of the herbs of their stem.  For the oregano, I showed him how to lightly pinch the stem and pull it through his fingers to get all the leaves off at once.  He thought that was pretty amusing.  :) I chopped the cilantro for him, then had Br use a little scraper to put it in the bowl.  I had Br smell the different ingredients, and taste it at different points to “decide what we needed to add”, to help bring in the sensorial component.

We also put in a squeeze of lemon. I squeezed it with my hand, but I probably could have had Br do it if we’d used a citrus juicer or reamer.

Stir, check there aren’t any giant chunks left (and if there are, have them cut them with the shears), and sample!

Post Script: Br had tried to pressure some of his kid friends to try it who apparently weren’t “salsa fans”, but I got a number of compliments from the parents & teachers, & they were shocked to find out Br had made it himself!

You might want to read this too:

  • This post was singularly original...wander at will!

Flannel Coasters- quick & easy gift idea for father’s day!

At least at the preschooler skill level, this is one of those gifts that will probably only be appreciated by people who REALLY love your kid and/or don’t have a strong aesthetic attachment to their coasters, as it is a gift that is vaguely functional, but mostly sentimental.

Br (3 1/2) made his first one for my mom for Mother’s Day (who lovingly exclaimed at the “artful” placement of the stitches, with great sincerity), and we decided this might be good to make for Daddy for father’s day.  I thought it might slightly compensate for the fact Br regularly asks unanswerable questions like “Why does Daddy drink soda all the time when it’s not good for you?” ( I SWEAR I didn’t put him up to it)

Materials:

-flannel (we used 2 different colors of the small rectangular pieces you can by for ~$0.25 for plain solid colors to ~$1.00 for the “fancy” embossed/glittery/etc. ones)

-something “coaster sized” to trace (keep in mind straight lines are easier to cut)

-chalk (we used sidewalk chalk)

-scissors

-needle & thread (Br choose to do 2 different contrasting colors.  Hey, it’s his present to Daddy…)

Tracing the coaster on to the flannel

I helped Br line our object up with the corner of the flannel (so he’d only have to cut 2 sides) and steadied it while he traced around it with the sidewalk chalk.  Br is old hat at this now, but make sure to explain to them to keep the chalk right against the object so they get a nice straight line, and check that it is showing up on the flannel, in case they need to trace over it again.

Have them cut along their chalk lines.


Cutting out the coaster
Cutting out the coaster- Voice of experience: if you don't want a "rounded" corner, it can be helpful to explain to them it is easier to get the nice square corner if they cut one side, then stop and cut the other side until they meet

Repeat with the second piece of flannel.  Match the 2 pieces together.  Let your child choose their thread (Br chose “aqua” thread for the first needles worth, and “black” for the second), and thread the needle.

Voice of Experience: I “double-threaded” it so the thread won’t pull out of the needle as they are sewing- pulled the thread through so it is doubled over (twice the length you want it, with the needle in the middle, and then the two ends tied in a single knot) and made it about a foot and a half long (long enough to give room for free sewing, but not unmanageable for short arms).  I did need to do multiple needles worth for Br to get the whole coaster “sewn”.

knot from thread hidden in middle

I started the needle in the coaster for him (put the knot on the inside),and then let Br take over.  The first time we did this activity was the first time Br had sewn, so here is a summary of the directions I gave him:

1)showed him the needle and explained the pointy end is what he will push though the cloth, but to watch out that he doesn’t poke himself with the pointy end

Br starting sewing
Br starting sewing

2)Once he has poked the needle partially through, grab the needle on the other side and pull it the rest of the way through

3) pull the thread tight, but not so tight the fabric gets wrinkly (showed what it looked like if the thread isn’t tight enough, as well as how to flatten it back out when it gets pulled too tight)

Br sewing
Br sewing- second needles worth, where Br decided he needed to switch to black thread

4)be careful to go back in with the next stitch from the same side you came out (this needed lots of reminding, with a few we didn’t catch early enough, which then goes back to making sure you don’t pull the thread so tight it gets wrinkly…)

I kept an eye out for when the thread was getting short, then offered to tie a knot and start a new thread for him.  He was pretty well done with the activity by the time we were almost done with the second needles worth (was starting to suggest “Mommy, you can finish it…”)  I tried to suggest he put some stitches in corners he hadn’t sewn yet as he was getting to the end.

Br showing his finished flannel coaster for Daddy

Happy Father’s Day!


You might want to read this too:

  • This post was singularly original...wander at will!

The importance of boogeying in the kitchen

I was speaking with one of the Early Childhood Education experts from First 5 of El Dorado County the other day (Kristen Torres, to be specific).  She was telling me she gets asked all the times by busy parents “what is the ONE thing I can do for my children that will make the most difference?”  Kristen’s response “Dance!”

While I am all for getting my “boogey” on, mostly in the kitchen these days, and grabbing whatever kid wanders by first to conscript in, I was a little surprised by her answer.  Kristen went onto explain that “rhythm” is important for a number of developmental steps (at this point I was concerned for my best friend’s son…hope he inherits his mommy’s rhythm!).

Language is rhythmic, walking & running is rhythmic.  By dancing with your children, you are helping to develop their rhythmic awareness in a fun & engaging way (all about play as learning!).  There often happen to be other side benefits: bonding (see my “conscription” above), aerobic exercise, “crossing the midline”- left/right & top/bottom (important for connecting brain hemispheres), vestibular system development (inner ear- important for balance & sensory integration) from our fancy spinning, and if you sing along loudly like me, vocabulary development.*

*on that note, be a little careful of your musical choices.  Like don’t accidentally download the ORIGINAL version of CeeLo’s “Forget You” like my husband did.  Don’t want to develop that kind of vocabulary….

So, grab that kid, crank those tunes (but try not to blow out their developing ear drums…), and get your dance on!  If your husband gives you funny looks when he comes in, pass him a kid and tell him it’s required curriculum: you’re making your kids smarter!  :)


You might want to read this too:

  • This post was singularly original...wander at will!